Final Project |
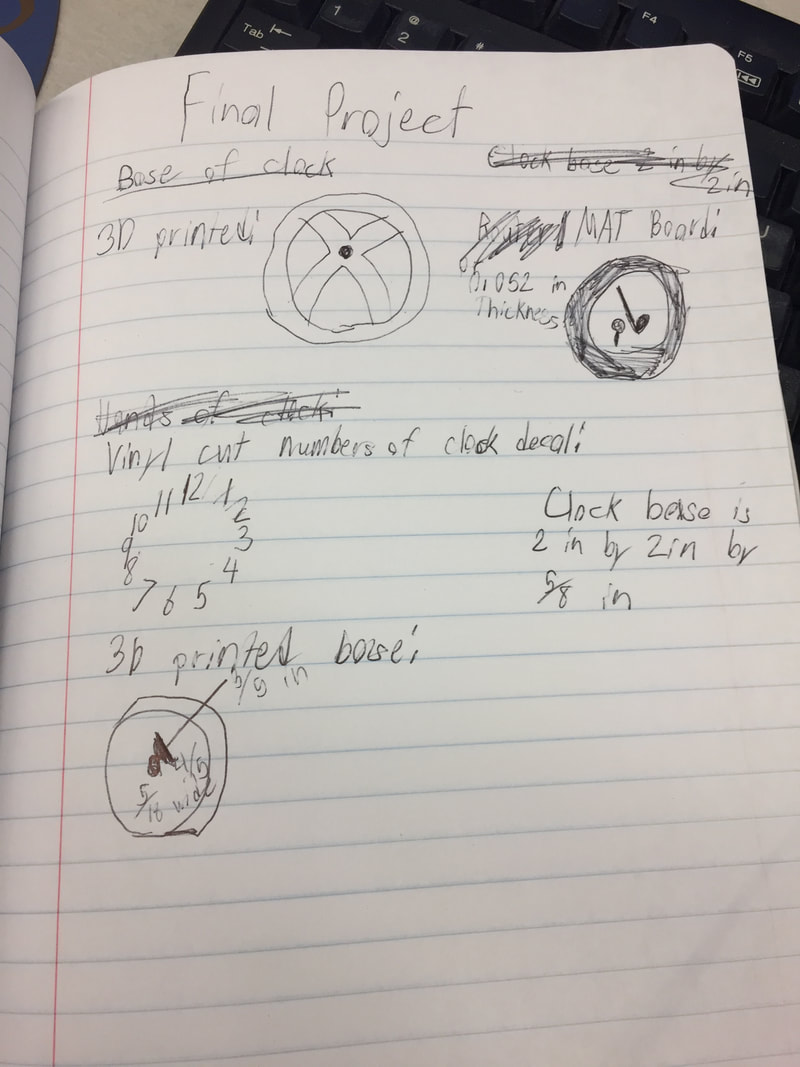
I first thought of ways to use three of the machines in the innovation center the most efficiently and what ways would make the clock look the best. I decided on making the clock design out of MAT board engraved on the laser, the base 3D printed, and the numbers cut out with vinyl to create a decal. I decided on the golf design because I enjoy golf and the sport in general.
Laser
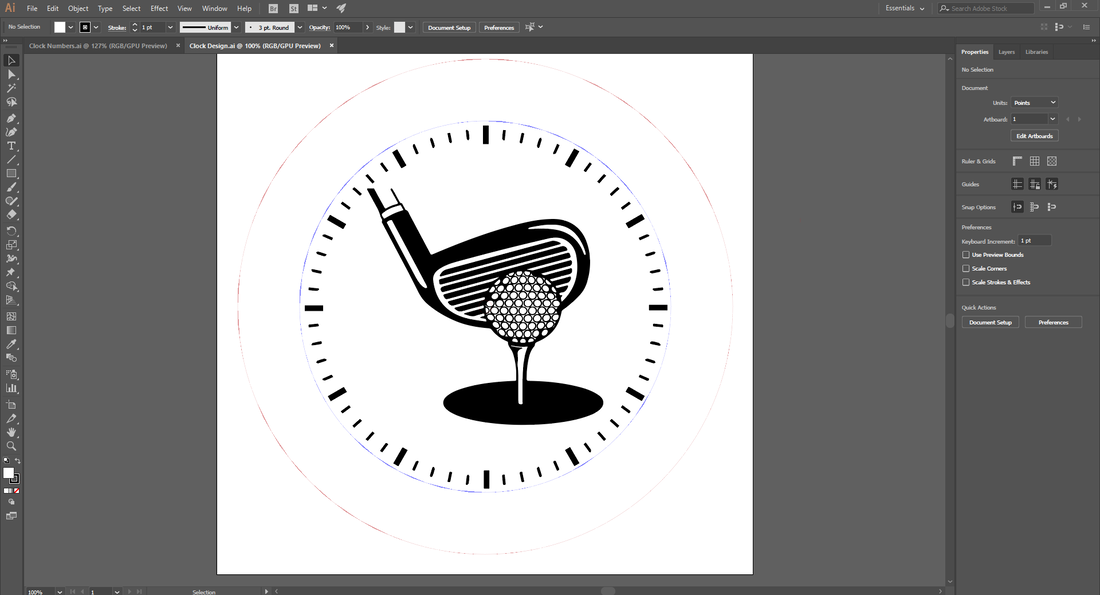
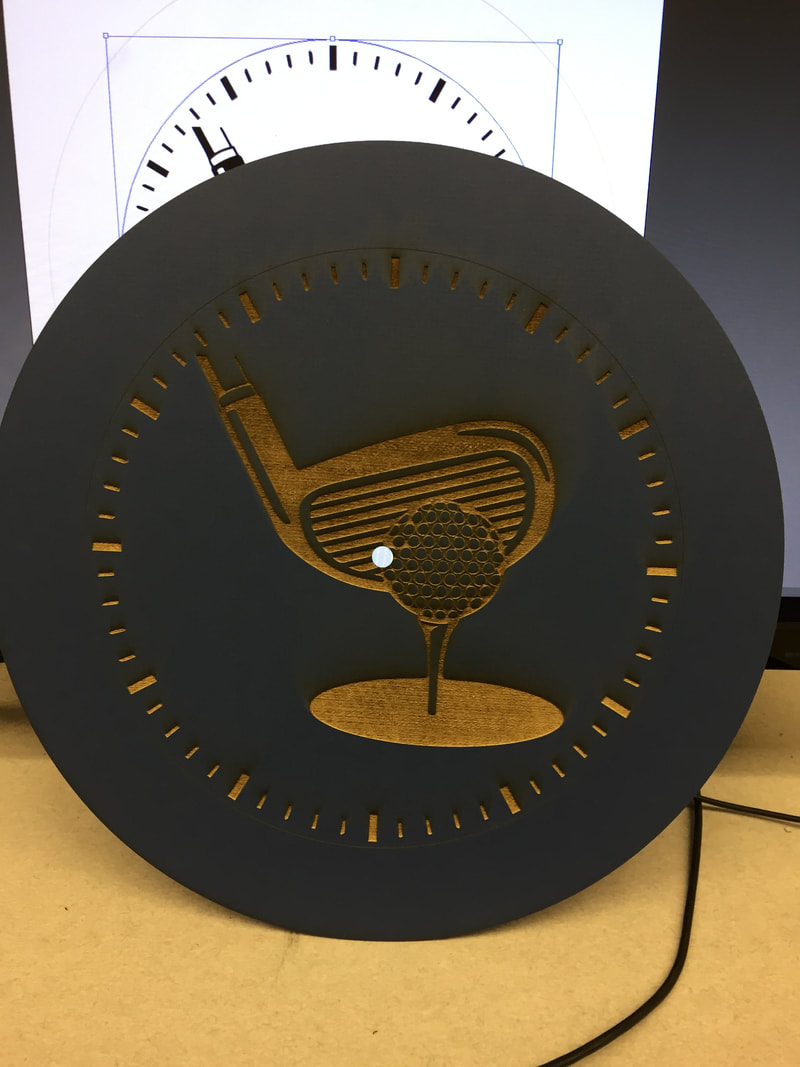
I started by creating the clock design and engraving it into a piece of MAT board using the laser.
|
|
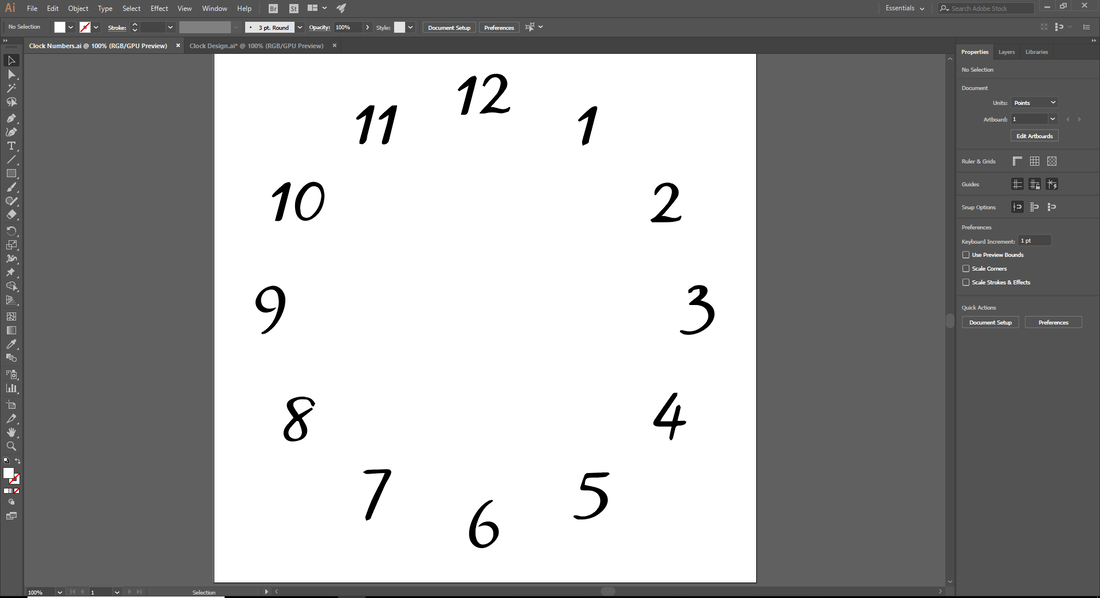
After printing I started designing my clock numbers.
Vinyl

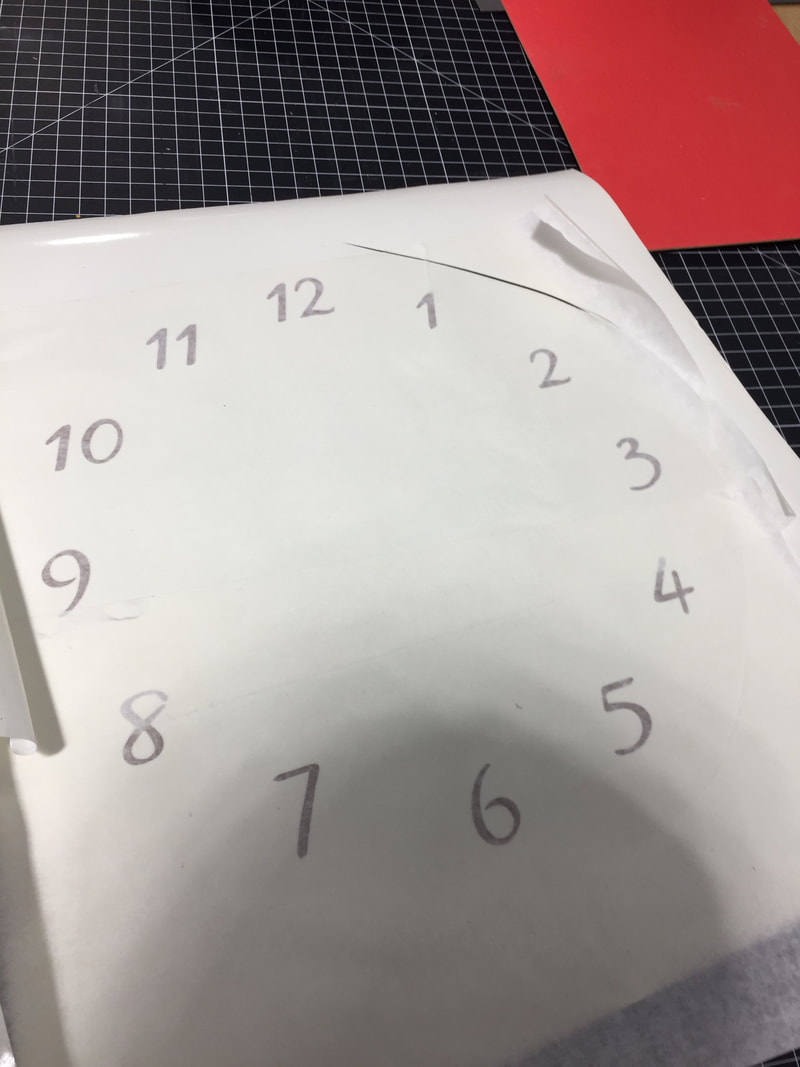
I decided to use an image from google to create my clock numbers to assure they were in the correct circular position.
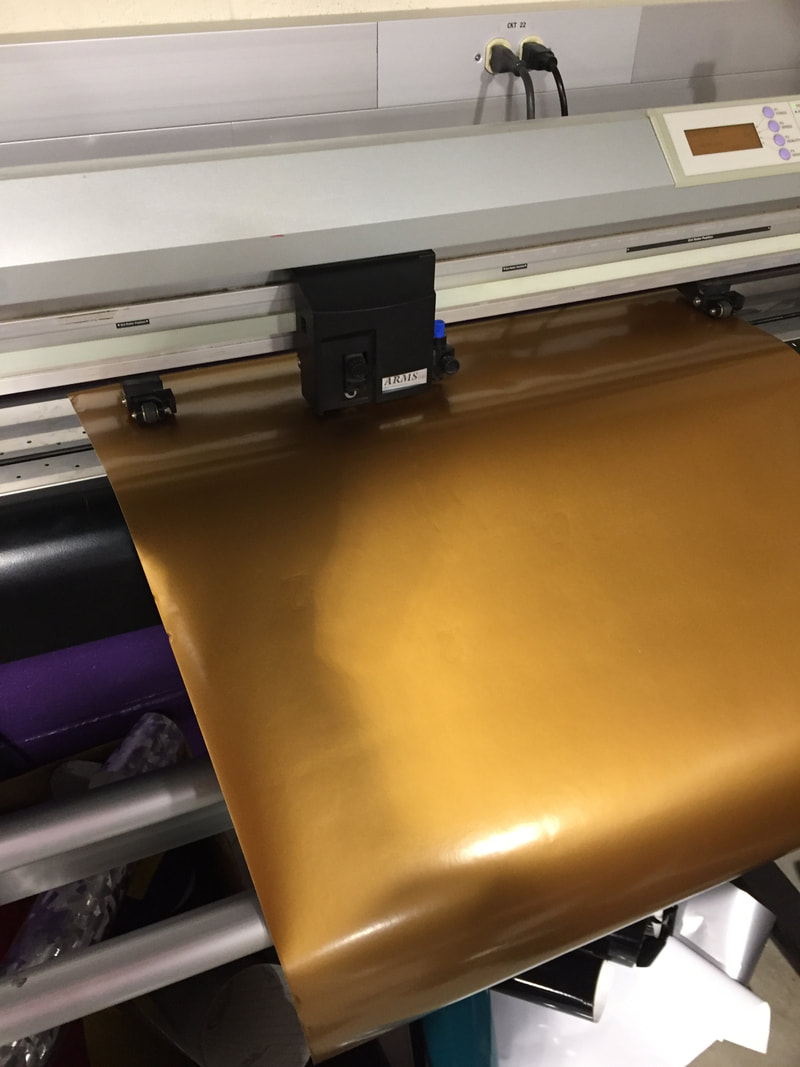
Then I printed my vinyl after getting everything set up. I decided to use bronze because it was the closest color available to the engraving of the MAT board.
|
|
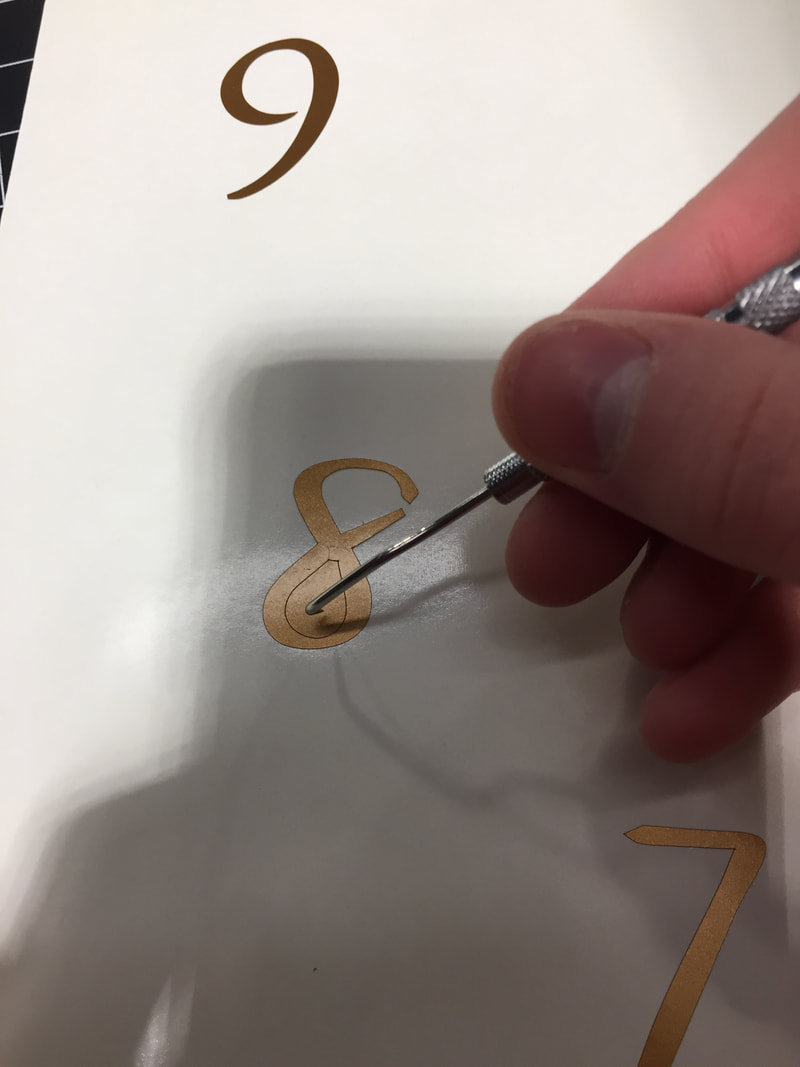
Then I picked off any spaces left inside the numbers and put transfer tape on the numbers.
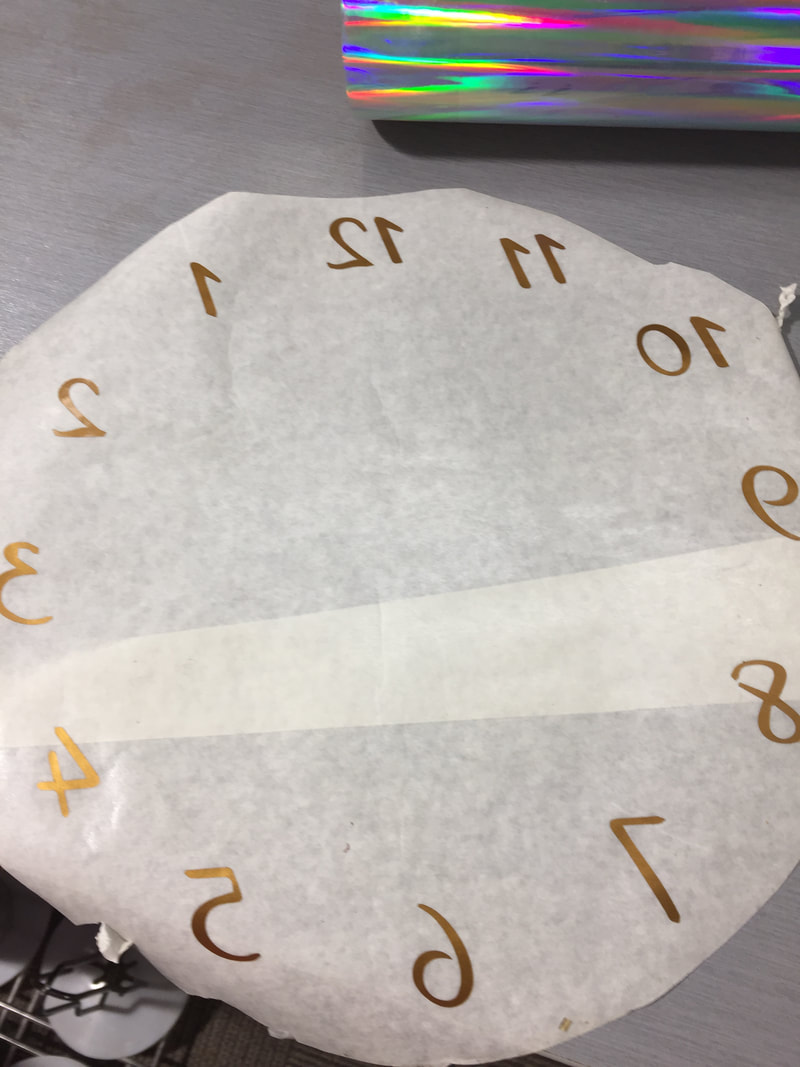
Once the numbers were transferred onto the transfer tape I put the transfer tape over my clock design.
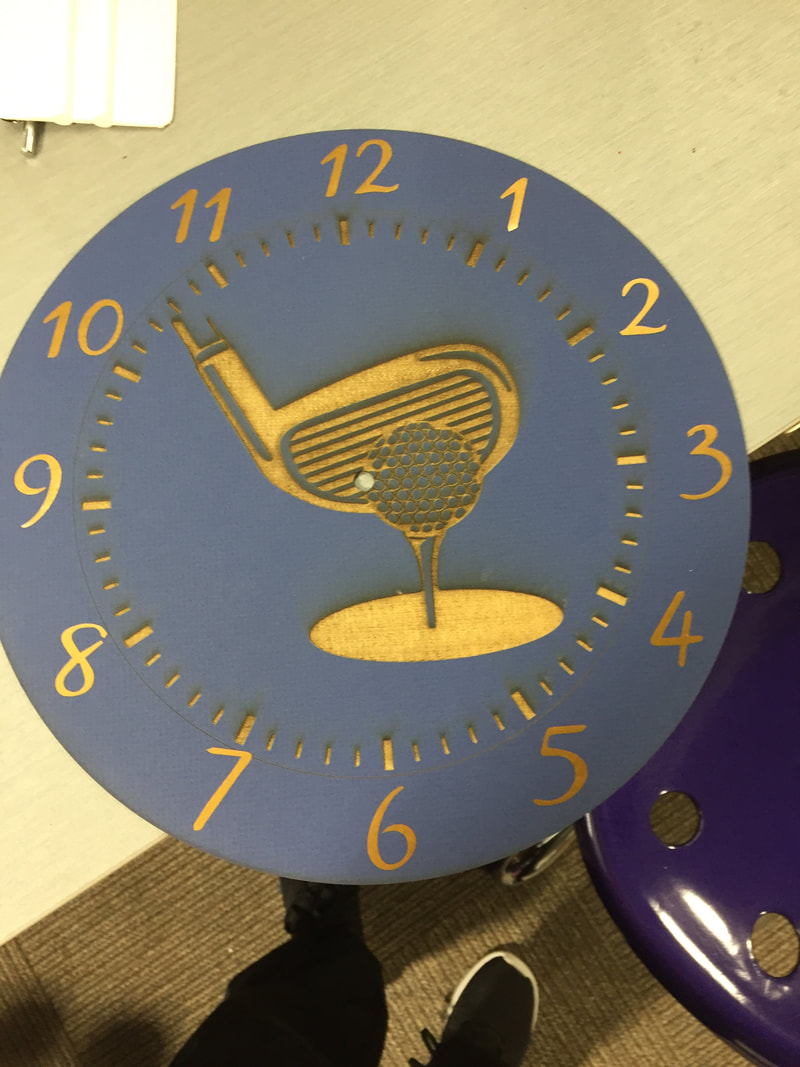
I put the transfer tape over the clock design and slowly peeled it off so the numbers would come off on the design.
3D Printing Makerbot
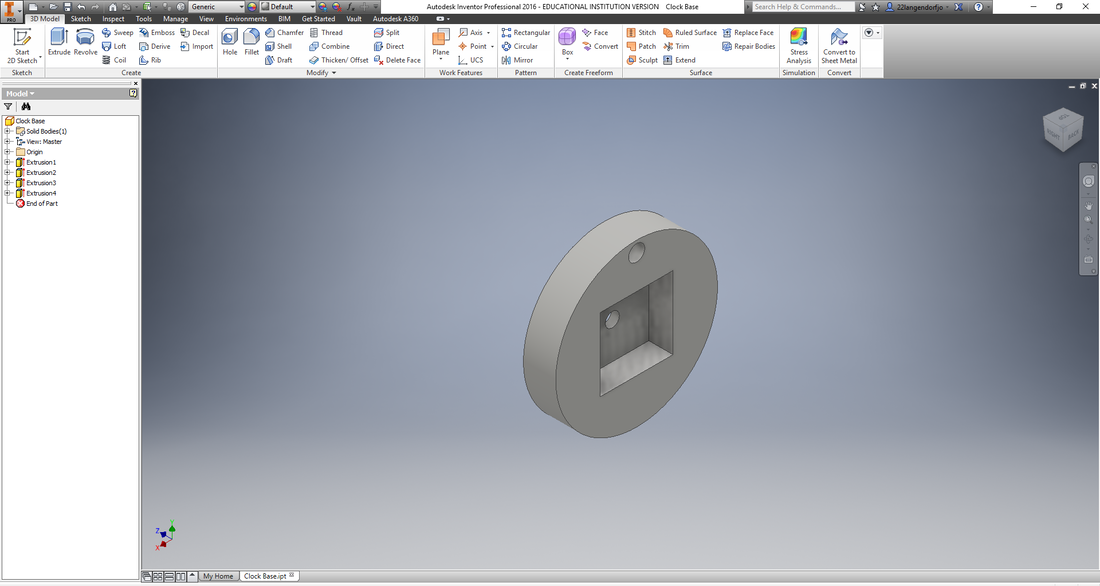
I created my clock base so the clock mechanism could fit inside of it and stay stable while the place where the clock hands should go and the clock design go is still available.
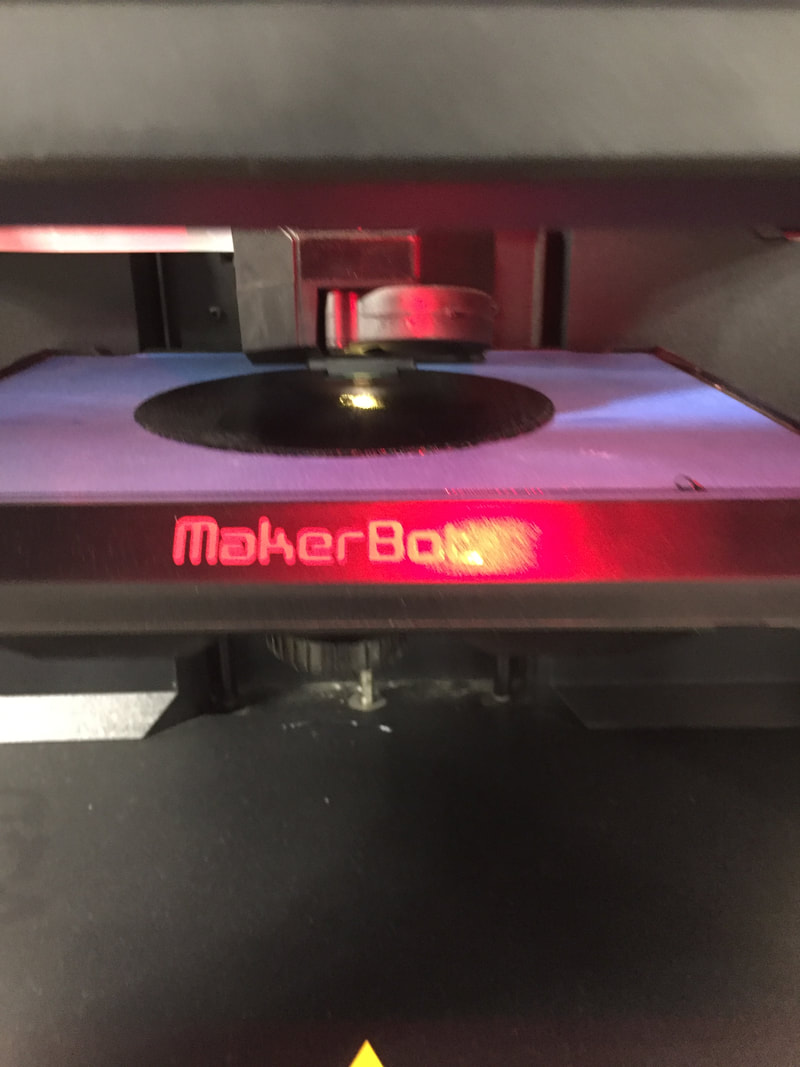
I then printed the clock base.
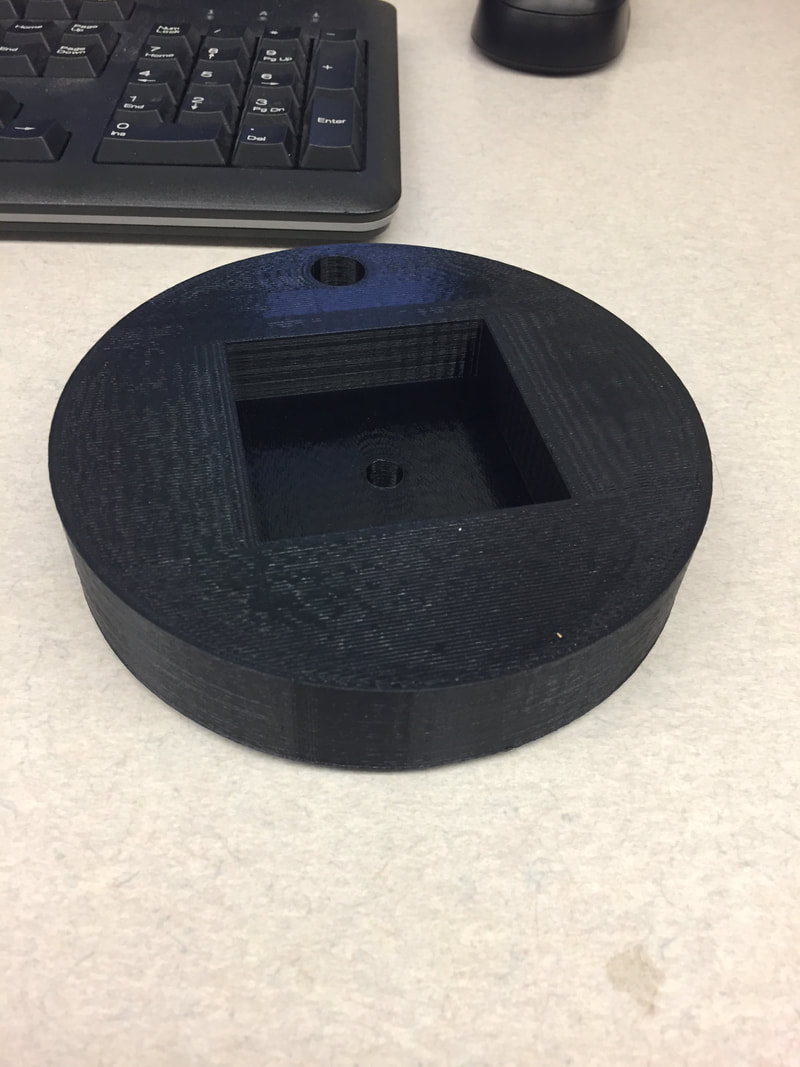
After the clock base finished printing I came in to pick it up after school because I have third round buses so I had time. I took all the parts home to assemble them.

Once I got home, I started to assemble the clock with the assistance of my father because I didn't know how to assemble it exactly. We got everything working and the clock is going strong!
What I learned
In the final project I learned how to create multiple designs and combine them into one form. I also learned how to use multiple machines to create a project that looks better than if I used only one.
